
 View larger

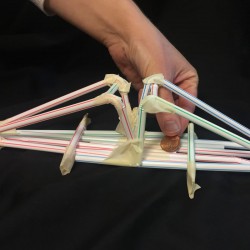
Build a Straw Bridge
New activity
Using tape and no more than 20 straws, design a bridge that can span a gap of about 1 foot (at least 25 cm) and support as many pennies as possible.
Open Activity
How-to Video
Family Take-home Activity
A take-home that can be sent with patrons that wish to do STEM activities at home. These at-home activities cover similar topic areas as the associated activity and could be handed out at the conclusion of a program or left on a circulation desk for patrons to take home.
-
Rating
-
Participants Enjoyed the ActivityParticipants Learned from This ActivityActivity Instructions Were Clear and Easy to FollowWould Recommend
Related Programming Resources
Reviews
All Ages Fun
I have done this program for 4-6th graders, and it was a great success. We started by sharing a video that explained how bridges were built, and then followed it with a discussion on what shapes were strongest. The kids then used that knowledge to build their own bridges. We allowed the kids to do test runs of their bridges, so they could modify their designs as needed. Although the original activity calls for 200 pennies, we had several bridges that easily held 200 pennies, so more pennies on hand is not a bad thing! Additionally, all the kids really enjoyed watching everyone else's bridges and how they fared. going as far as group counting as the pennies were placed on the bridge.
The reason I say this is all ages fun, though, is that I've also done this activity in a continuing education class, and the whole room full of some 40 adults were abuzz with laughter and excited planning; and while there was no group counting as their was with the kids, there was lots of cheering and exclaiming as each bridge was tested!
Built to last.
This program was a blast! We had to make a couple of concessions based on availability of supplies, but a little flexibility goes a long way here. We only had bendy straws, for example, as well as blue painter’s tape and washers instead of pennies. (As it turns out, washers are more expensive than pennies, so our solution won’t be practical for every group.)
We ran this program as a part of a weekly makerspace program which takes over our large meeting room for two hours each Monday, and the bridge-building and “testing” parts lasted for most of that time. Every group will look and feel different, especially when it comes to the time required to finish the bridges; our group was made up of roughly fifteen kids aged four through eleven. Some of our kids elected to work individually, and others requested to work in groups. The groups almost universally took longer to complete bridges of similar design and complexity to those working individually, mostly because they were kept busy “negotiating” various design features.
A couple of thoughts:
- Explaining the length requirements and testing processes with a demonstration at the very beginning is extremely important, especially for the younger children. All of our kids understood once they saw the challenge in process, but some of the terminology didn’t quite stick. That turned out to be fine.
- Test out the testing process (recursive, I know) before you actually run the program. It’s not practical to sit a cup of pennies on top of every bridge design. The truss bridges were notoriously difficult, so we ended up creating a sling which hung beneath the bridges to hold the weight. Doing so was tricky and took up time, however.
- Printing out and perhaps even laminating a number of different bridge designs for inspiration is also useful, especially for those younger children. We are situated in a part of the country which is mostly sans bridges, and those which *are* around are the standard concrete highway overpass kind of construction. Most of our kiddos had never seen a suspension or truss bridge in their lives, which is worth noting for more rural and landlocked communities like ours. So: photos really help as props and demonstrations. If you have bridge-related items in your library collection, those might substitute.
- Measuring out a standard length or two of tape for each bridge in addition to counting out the straws is important, as we had several groups overdo it on the tape—to the point where the bridge masses were made up of a higher percentage of tape than straw.
- The “redesign” part of the process is really important! I highly recommend timing the first building session, keeping it short, then doing the testing. After the first round of testing, offer more time to redesign each bridge. For many of our younger kiddos the activity really “clicked” during the test, and they were begging to “fix” them even before I had finished adding the washers/pennies!
- Offering a prize for the strongest bridge is a great incentive, but as most librarians are probably already aware, it can be divisive as well. Finding a way to reward participants for the considerable time and effort involved is important, but if you can do so without prioritizing “winning” over “engineering” ... do that, and then let me know how you managed it!
Overall, this program was great fun, and the kids especially enjoyed the fact that they got to take their bridges home afterward. I was glad to see how much the younger participants loved this program—many of them partnered with older siblings but quite a few elected to go solo, with really significant and fantastic results! Our second-youngest solo participant actually ended up with the strongest design, and her smile lit up the room.